Hello There!
I finally got around to making my first tutorial for the 2 drawer box easel. Please excuse the photo quality as it is taken on my phone! Since it takes a bit of time for your first time I will go straight to the supplies needed and let you have some fun with making your own!
Materials:
3- 12x12 paper of your color choice
2- brads for the knobs
2- clothes pin small size (optional)
1- sheet of designer paper of choice
double sided tape
mono tape
scissors
small hole punch
skinny ribbon of choice/color
Step 1: Take your 3- 12x12 paper and cut it into the following sizes
1- 6 1/8 x 12 inches (the easel part)
1- 8x8 inches (the 4x4 drawer)
1-6x8 inches (the 2x4 drawer)
2- 81/8 x 4inches (enclosed box to hold drawer)
 |
| Here is the 6 1/8 x 12 paper |
 |
| Here are the 2- 8 1/8 x 4 paper |
 |
| Here are the 8x8 and 4x6 paper |
Step 2: Scoring Paper you cut above
- Take the 8x8 paper and score it at 1 inch, 2 inch, 6 inch, and 7 inches (this will be 1 inch apart for the score lines on each end)
- Change the paper into the other side and do the same scoring measurements. When you are done it will look symmetrical on all sides being scored.
Repeat steps for the 4x6 paper where the paper is scored at 1inch, 2 inch, 5 inch, and 6 inch
- Take the 6 1/8 x 12 paper and score it at 4 inch, 6inch, and 8 inches

- Fold the paper like the below picture. This will be the Easel portion of the box.
 |
| Here is the side view of what it looks like |
- Take the 2 sheets of 8 1/8 x 4 and score it 1 inch in from opposite ends. Remember that the right side is 1/8 more due to the cut of the page...so score at 7 1/8. The reason for this is to give room for the drawers to snuggly fit in when assembled.
- Fold the cored sides of the paper like below
 |
| Here is what it will look like above when glued with double sided tape |
Step 3: Cutting the corners of the 4x4 and 2x4 boxes for assembly
- The easiest way I can explain this is to cut in 2 inches on one side which is the to the 2nd scored line and cut in 1 inch on the other side which is up to the 1st scored like only.
-Then cut diagonal across which leaves a triangle flap like below for assembling.
- Do this to the opposite side but be consistent of cutting the triangle flaps to face each other to make it easier for assembling. Hope you can see what I mean from my picture below. Continue doing this for all corners on the other side for both the 4x4 and 2x4 boxes.
 |
| This is the 2x4 box being cut already |
- Once done cutting corners, fold all score lines for the boxes like the picture below
- Below is how the boxes look like with their scored lines folded
Step 4: Cutting designer paper
Cut the following:
3- 7/8x 3 7/8 strips (These are for the 2 sides and 4x4 drawer)
1- 7/8x 1 7/8 strip (This is for the 2x4 drawer)
2- 3 7/8x 6 inches (This will be for the easel top and bottom)
- Take these strips and glue them onto the boxes, sides, and easel portion first before assembling as it makes it easier.
 |
| Example of the designer paper on the drawers |
- You only need to glue on one strip of the 4x 6 1/8 as we will glue the other sheet inside
 |
| Example of DP on sides of box |
- Below is how you should glue or mono down the easel portion of the paper.
Step 5: Hole Punching drawers
- You want to fold down the outer flap and place the hold punch in the middle and punch out so we can put brads in place for the drawers. Do this for both.
 |
| Example of outer flap folded down |
 |
| Example of 4x4 after hole punched |
Step 6: Adding Ribbon
- Below I just took purple skinny ribbons and tied it together that fits snuggly around the top easel portion and cut the ends off when I am done.
Step 7: Assembly with double sided tape
- So cut and place the double sided tape down on the lower end of the scored line like the below picture for both boxes
- Take of the top side of the tape in this case the 2x4 box short end since it will bind the sides with the triangle portion.
- Below is how it looks like when you bring the triangles in to line up with the top flap not folded down yet.
- Below is the top flap folded down not continue on the other end to secure the flaps in place
- Below is the other end being binded, once done you can take the tape off on the longer side and fold down the top flap to finish off the box.
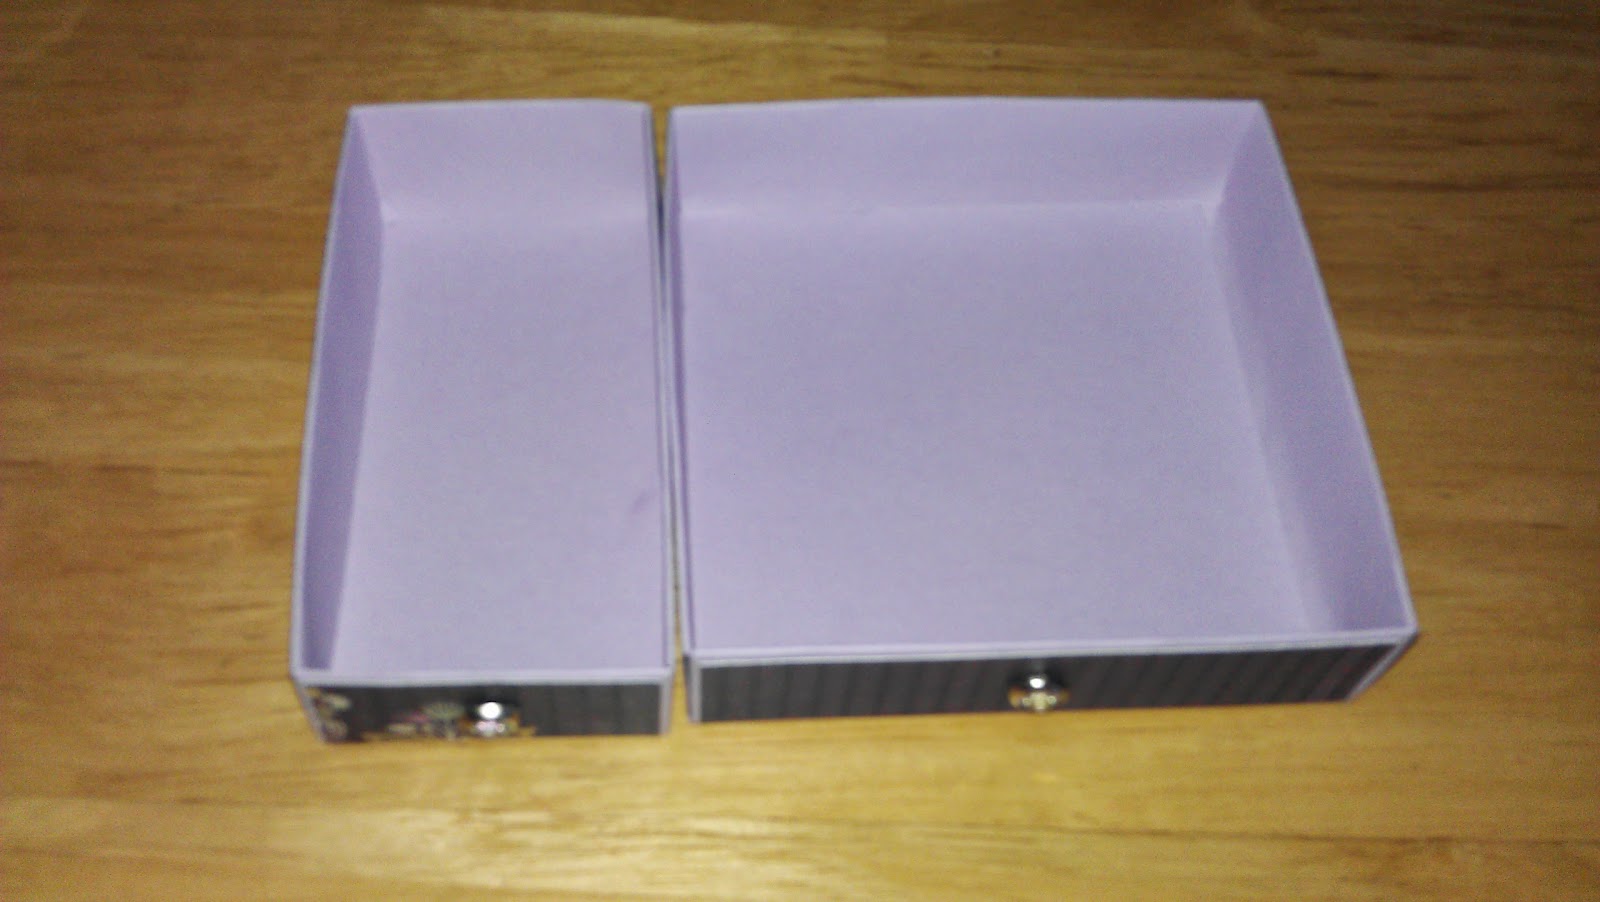
- Below is the finished box, do the same steps for the 4x4 box
- Once finished you can put on the brads for the knobs on the front side of the drawers
- Now take the strip that will have the boxes enclosed with, and put double sided tape on the sheet that you didn't glue the designer paper on like below
- Below is the two strips and I have the double sided tape strip folded to attach to the top portion
- Below is the tape side folded down, I would take the top strip and flush it to fit over the scored portion
- Below is what it looks like taped
- Before you secure the other end, I would put the 2x4 and the 4x4 boxes in and secure the other end so the boxes will fit comfortably when done.
- Put double sided tape on the inner flap of the easel portion and tape the top flap down
- Below is the side view to show you where the tape goes, this will secure the ribbons you tied and help the easel sit in place.
- Below is what it looks like taped down on a side view.
- Now take the top easel and glue it on top of the box that encloses the 2 drawers
- Tah dah...now you are pretty much done! I stamped a sentiment from Amy R "Get Well" set and popped it up on the box. I also used a picture this time clipped by mini cloths pin instead of the calendar's. So you pretty much can make it into anything you want. Hope this tutorial helps! So sorry for those of you wanting to do it sooner but with no tutorial.
Please feel free to give me feedback how this went if you are going to try it. I tried to be specific and visual as much as possible. Thanks for stopping by and bearing with me for the long tutorial =)